
Electrical Knowledge
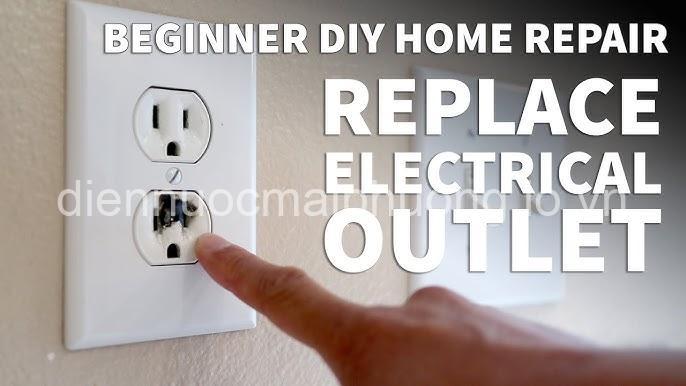
How to Replace a Broken Electrical Outlet Safely – DIY Guide
Sep
How to Replace a Broken Electrical Outlet Safely – DIY Guide. In today’s article, diennuocmaiphuong.io.vn will explore with you in the most detailed and complete way. See now!
How to Safely Replace a Broken Electrical Outlet
Step 1: Disconnect the Power
The first and most crucial step is to ensure the electrical outlet is completely de-energized. This prevents any risk of electric shock while you work.
- Identifying the Correct Circuit Breaker: Locate your electrical panel and identify the circuit breaker that controls the outlet you’re working on. You can use a voltage tester or a simple process of elimination to confirm the correct breaker. Turn off the breaker and wait a few moments to ensure the power is completely off.
- Using a Voltage Tester to Verify Power is Off: A voltage tester is a simple but essential tool. Touch the probe to the outlet’s terminals to confirm there’s no electricity flowing. This extra step adds an additional layer of safety before you begin.
Step 2: Remove the Old Outlet
With the power off, you can safely remove the old outlet.
- Loosening and Removing the Mounting Screws: Use a screwdriver (Phillips or flathead, depending on the outlet) to loosen the screws that secure the outlet to the electrical box. Once loose, carefully remove the outlet from the box.
- Disconnecting the Wires from the Old Outlet: Once the outlet is free, you need to disconnect the wires. Gently loosen the wire connectors (wire nuts) holding the wires together. Carefully pull each wire loose from the old outlet. It’s recommended to label the wires (black, white, and green) with tape or markers to ensure proper reconnection later.
Step 3: Install the New Outlet
With the old outlet removed, you’re ready to install the new one.
- Connecting the Wires to the New Outlet: Connect the wires to the new outlet’s terminals. Match the wire colors to the corresponding terminals: black to black, white to white, and green to green.
- Matching Wire Colors to Terminals: The black wire is the hot wire carrying the current. The white wire is the neutral wire and carries the return current back to the source. The green wire is the ground wire, providing a path for electricity to flow in case of a fault.
- Using Wire Connectors (Wire Nuts) to Secure Connections: Secure each wire connection using wire connectors. Twist the connectors firmly onto the wire ends to ensure a secure connection.
Step 4: Secure the New Outlet
The new outlet is now wired, so you need to mount it securely in the electrical box.
- Attaching the Outlet to the Electrical Box: Align the outlet with the electrical box and use the screws to secure it. Tighten the screws firmly, but avoid overtightening, which could damage the outlet.
- Ensuring the Outlet is Flush with the Wall: After securing the outlet, double-check that it sits flush with the wall. A flush outlet ensures a secure and aesthetically pleasing installation.
Step 5: Test the New Outlet
The final step is to test the new outlet to ensure it’s working correctly.
- Turning the Power Back On at the Breaker: Turn the power back on at the circuit breaker.
- Testing the Outlet with a Device or Voltage Tester: Plug in a device or use a voltage tester to confirm that the new outlet is energized and working properly.
Essential Tools and Materials
Here’s a list of the essential tools and materials you’ll need for this task:
- Tools
- Screwdriver (Phillips and flathead)
- Wire Strippers
- Voltage Tester
- Materials
- Electrical Tape
- Wire Connectors (Wire Nuts)
- New Electrical Outlet
Troubleshooting Common Problems
Sometimes, things don’t go as planned. Here are some common problems you might encounter and how to troubleshoot them:
- Loose Connections: If the outlet doesn’t work properly, the first thing to check is for loose connections. Tighten all the wire connections at both the outlet and the electrical box, ensuring a firm connection.
- Damaged Wires: If the outlet is damaged, the wires might also be damaged. Inspect the wires for breaks, cuts, or other damage. Replace any damaged wires with new ones.
- Incorrect Wiring: If the outlet is wired incorrectly, it will not work. Double-check that the wires are connected to the correct terminals on the outlet. Refer to the wiring diagram on the outlet to ensure proper connection.
Important Safety Precautions
Always prioritize safety when working with electricity. Here are some essential precautions to keep in mind:
- Always Disconnect Power Before Working: This is the most important safety rule. Never work on an electrical outlet while it’s energized.
- Use Proper Safety Gear: Always wear gloves and eye protection to protect yourself from potential hazards.
- Work in a Well-Lit Area: Ensure that the area where you’re working is well-lit to prevent accidents.
- Avoid Touching Live Wires: Never touch any wires that are connected to the electrical outlet.
- Seek Professional Help If Unsure: If you are unsure about any part of the process, don’t hesitate to call a qualified electrician.
When to Call an Electrician
While replacing a broken electrical outlet is a DIY task, it’s essential to know when to call a professional:
- Major Electrical Repairs: If you’re dealing with major electrical repairs beyond a simple outlet replacement, it’s always best to call a qualified electrician.
- Working with High Voltage: If you’re working with high voltage, it’s extremely dangerous. Leave these tasks to professionals.
- Complex Wiring Issues: If you encounter complex wiring issues, it’s best to consult with an electrician for a safe and effective solution.
- Uncertainty or Lack of Experience: If you’re not confident in your electrical knowledge or experience, it’s best to seek professional help to ensure safety.
- Safety Concerns: If you have any safety concerns, don’t hesitate to call an electrician. It’s better to be safe than sorry.
FAQs About Replacing a Broken Electrical Outlet
What type of screwdriver do I need?
* You’ll likely need both Phillips and flathead screwdrivers for this job.
How do I know which circuit breaker controls the outlet?
* You can use a voltage tester to check the outlet for power while turning off each breaker in the panel. If the power shuts off when you turn off a specific breaker, that’s the one that controls the outlet.
What if the wires are too short to reach the new outlet?
* You can use wire connectors to extend the wires. However, always follow the manufacturer’s guidelines for safe wire extension.
What should I do if I can’t identify the correct circuit breaker?
* If you can’t locate the correct circuit breaker, it’s essential to call a qualified electrician.
What if I see sparks when I connect the wires?
* Sparks indicate a dangerous situation. Immediately disconnect the power and call a qualified electrician.
Conclusion
Replacing a broken electrical outlet is a simple DIY task with the right knowledge and safety precautions. By following these steps, you can confidently replace a broken outlet and restore functionality to your home.
If you have any questions or want to learn more about electrical repairs or products, visit diennuocmaiphuong.io.vn. Don’t forget to leave a comment below and share your experience with replacing an electrical outlet.
Let’s make home repairs easier and safer together!